NINE MONEY SAVING DIYS
Save yourself time and money with these easy and cost effective RV upgrades
WORDS AND PHOTOGRAPHY BY GRANT HANAN ADDITIONAL PHOTOGRAPHY BY CARAVAN & MOTORHOME
There is no doubt that our RVs provide us with an excellent lifestyle, but there may be a few enhancements you’d like to make so touring is just that bit more comfortable. Here’s a look at 10 popular projects not only you can do yourself, but will save you some cash in the process.
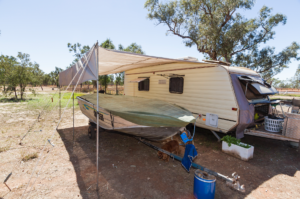
1 ALL WEATHER AWNING
Using a tarp, sail track rope, a few eyelets, and a sewing machine, you can quickly whip up an awning that can slide into an existing awning track. It’s perfect for extra all-weather protection or when you need a larger undercover storage solution.
NUTS ‘N’ BOLTS
Cost: Less than $30 if you already have a tarp
Saving: A minimum of $70 if purchased from a canvas supplier
Tip: Using nylon rope, heat the ends and twist to a point to make sliding in the track much easier
Difficulty: 2/5
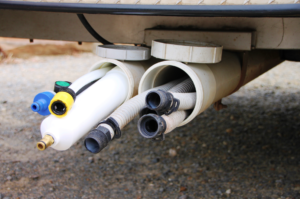
2 SULLAGE HOSE HOLDER
Trying to store a sullage hose can often get messy and tangled. By adding a PVC pipe and sliding them away makes the job a breeze. Pick up some PVC pipe, a couple of fittings glued at either end, and add a couple of twist caps. Secure the pipe in three or four places under your RV using hoop loop brackets attached to the cross beams.
NUTS ‘N’ BOLTS
Cost: Around the $50 mark
Saving: At least a $50 saving by doing it yourself
Tip: Use nuts and bolts rather than selftappers to attach to the cross beams. Vibrations from the road can cause the self-tappers to come loose, so nuts and bolts are a safer bet because you can torque them up a lot tighter.
Difficulty: 2/5
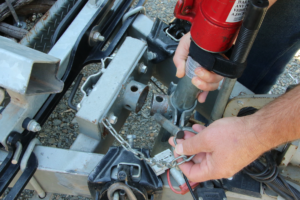
3 QUICK RELEASE JOCKEY WHEEL MOUNT
Installing a quick release jockey wheel mount will make unhitching a breeze when you have multiple items such as gas bottles, toolboxes and an outboard motor bracket on your A frame. Pick up a collar ring and sliding pin from your local truck and trailer supplier. First weld the collar ring to a mounting plate. Then drill and bolt the plate to your RV. The male connector bolts on to your jockey wheel/jack.
NUTS ‘N’ BOLTS
Cost: $40 in parts, plus welding if you need it made
Saving: Expect to save $100 in labour costs by doing it yourself
Tip: The welding needs to be strong, so unless you are competent have your local steel shop weld it for you
Difficulty: 4/5
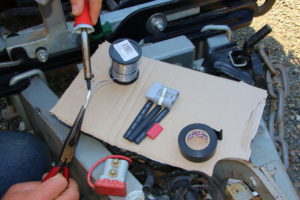
4 ANDERSON PLUGS FOR ACCESSORIES AND CHARGING
Adding external Anderson plugs to your RV provides an excellent electrical connection to your RV’s batteries. Ensure any electrical connections made to the batteries are fused. Use grommets for all penetrating holes through walls and the floor. Seal for dust using appropriate type products. Use solder and then wrap with heat shrink and insulation tape for strong electrical connections.
NUTS ‘N’ BOLTS
Cost: $10-$20 for plugs, fuse holder, terminal rings, plus cable costs per metre
Saving: Saving: You’ll save on labour rates of approx. $50 per hour by doing it yourself
Tip: Have the cables made up for you if you can’t solder. Fit them and connect them to your batteries yourself. Ask for advice on using the correct cable type for your project
Difficulty: 3/5
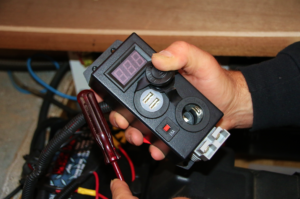
5 12 VOLT COMBINATION 5 BLOCK OUTLETS
These days many accessories use a variety of different plug types. Save on buying multiple adaptors and make one connection to your battery by installing a special purpose multi-plug box. Solder all electrical connections and use fuses or circuit breakers when connecting to battery terminals.
NUTS ‘N’ BOLTS
Cost: Shop around as the price will vary depending on the unit size and number of outlets
Saving: $95 (if parts were purchased individually)
Tip: Buy directly from a 12 volt type shop if you need assistance with soldering and have them solder the connection cable and terminals for you. You then only need to screw the box in place and connect to your batteries
Difficulty: 1/5
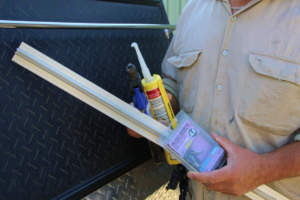
6 ADDING SAIL TRACKS
Adding a sail track to your RV’s offside is an excellent way to secure an awning or shade cloth to provide your RV with additional shade. Ensure the sail track is connected and sealed well to prevent dust and water entering your RV’s walls. Use a string line and spirit levels to get it straight, and blind style pop rivets with some sealer to affix the track in place.
NUTS ‘N’ BOLTS
Cost: The track costs around $10 per metre plus $30 for a packet blind rivets and sealer
Saving: Expect to pay $100 from a canvas supplier
Tip: Mark any holes and consider how you will seal them from water and dust before drilling
Difficulty: 3/5
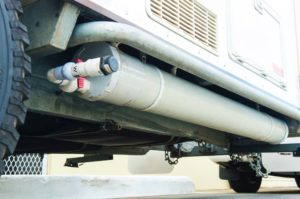
7 SATELLITE DISH HOLDER
If you have a satellite dish then you’ll know how awkward they can be to store. One option is to attach it to some exhaust pipe which has been bent to suit your RV’s configuration. The pipe is then mounted to your RV’s A-frame or rear bumper (provided it has the strength to hold it). Secure well using a clamp or bolt method taking wind dynamics and road vibrations into consideration.
NUTS ‘N’ BOLTS
Cost: Less than $30 if you use an exhaust pipe offcut
Saving: Save on labour costs of approximately $70 by DIY
Tip: Consider more than one single bolt to hold it all in place due to possible road vibrations working bolts loose
Difficulty: 2/5
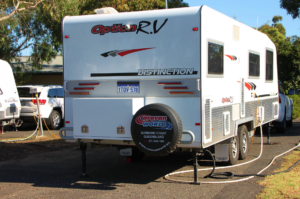
8 ADDING A STORAGE BOX
Storage boxes are a popular RV accessory. Some are located on A-frames whereas others are attached on rear bumpers, or even underslung. They’re available in either sheet steel or aluminium, or a combination of both. Whichever you choose, the box weight, its contents, and how it’s attached to the RV are all critical. It’s not as simple as one type fits all! You need to understand how adding a box and its contents affects your RV’s weight and towing performance.
NUTS ‘N’ BOLTS
Cost: $140 by purchasing off the shelf
Saving: A minimum of $100 when having one specifically manufactured
Tip: Before doing anything, seek expert advice if you’re unsure how adding a box and its contents affects your RV’s weight distribution and/or handling
Difficulty: 3/5 (provided it comes with the attachment system)
9 GREY WATER TANK
Aftermarket grey water tanks are all the talk at present. If you are after something that will only be used on the odd occasion, why not affix a PVC pipe and a quick connect fitting valve for those times when you need to collect and hold a night’s grey water.
NUTS ‘N’ BOLTS
Cost: DIY for less than $60
Saving: Grey water tanks start at $100 plus fittings and install
Tip: Keep it simple just for an overnighter and attach using nuts and bolts
Difficulty: 3/5
